Predicting and Planning Your Moon Photographs

My earliest moon photographs, shot on film, were planned using astronomical prediction tables, a large map, a protractor and a compass. And although I usually ended up in the right place at the right time, the preparation was arduous––even tedious. Then one day a photographer friend told me about Photoephemeris.Com/Web, an online application that I could use to plug in locations and dates to find everything I needed about the moon and sun’s appearances above the horizon—anytime and anywhere on earth. 

Since that time, over ten years ago, Stephen Trainor has greatly improved his already excellent application. I will demonstrate several methods to use the app to predict and plan for photographing the full moon during a Zoom class this March, 2021. (Date and time to be decided) The presentation will also include valuable tips on exposure and equipment, with time for group questions and discussion. The link for registrations will be announced shortly in an upcoming Marty Knapp News email. Compliments of Mr. Trainor, registrants will receive a 40% discount coupon code for subscription to the Pro Version of the application. As far as I’m concerned, the Pro version is indispensable!

To be alerted to the details of this event, please contact me at classes@martyknapp.com.  In the meantime check out the examples I made for a recent moonrise prediction and photograph using the Photo Ephemeris web app.

Five Steps to Successful Planning of a Full Moon Photograph

Click on images for larger renderings

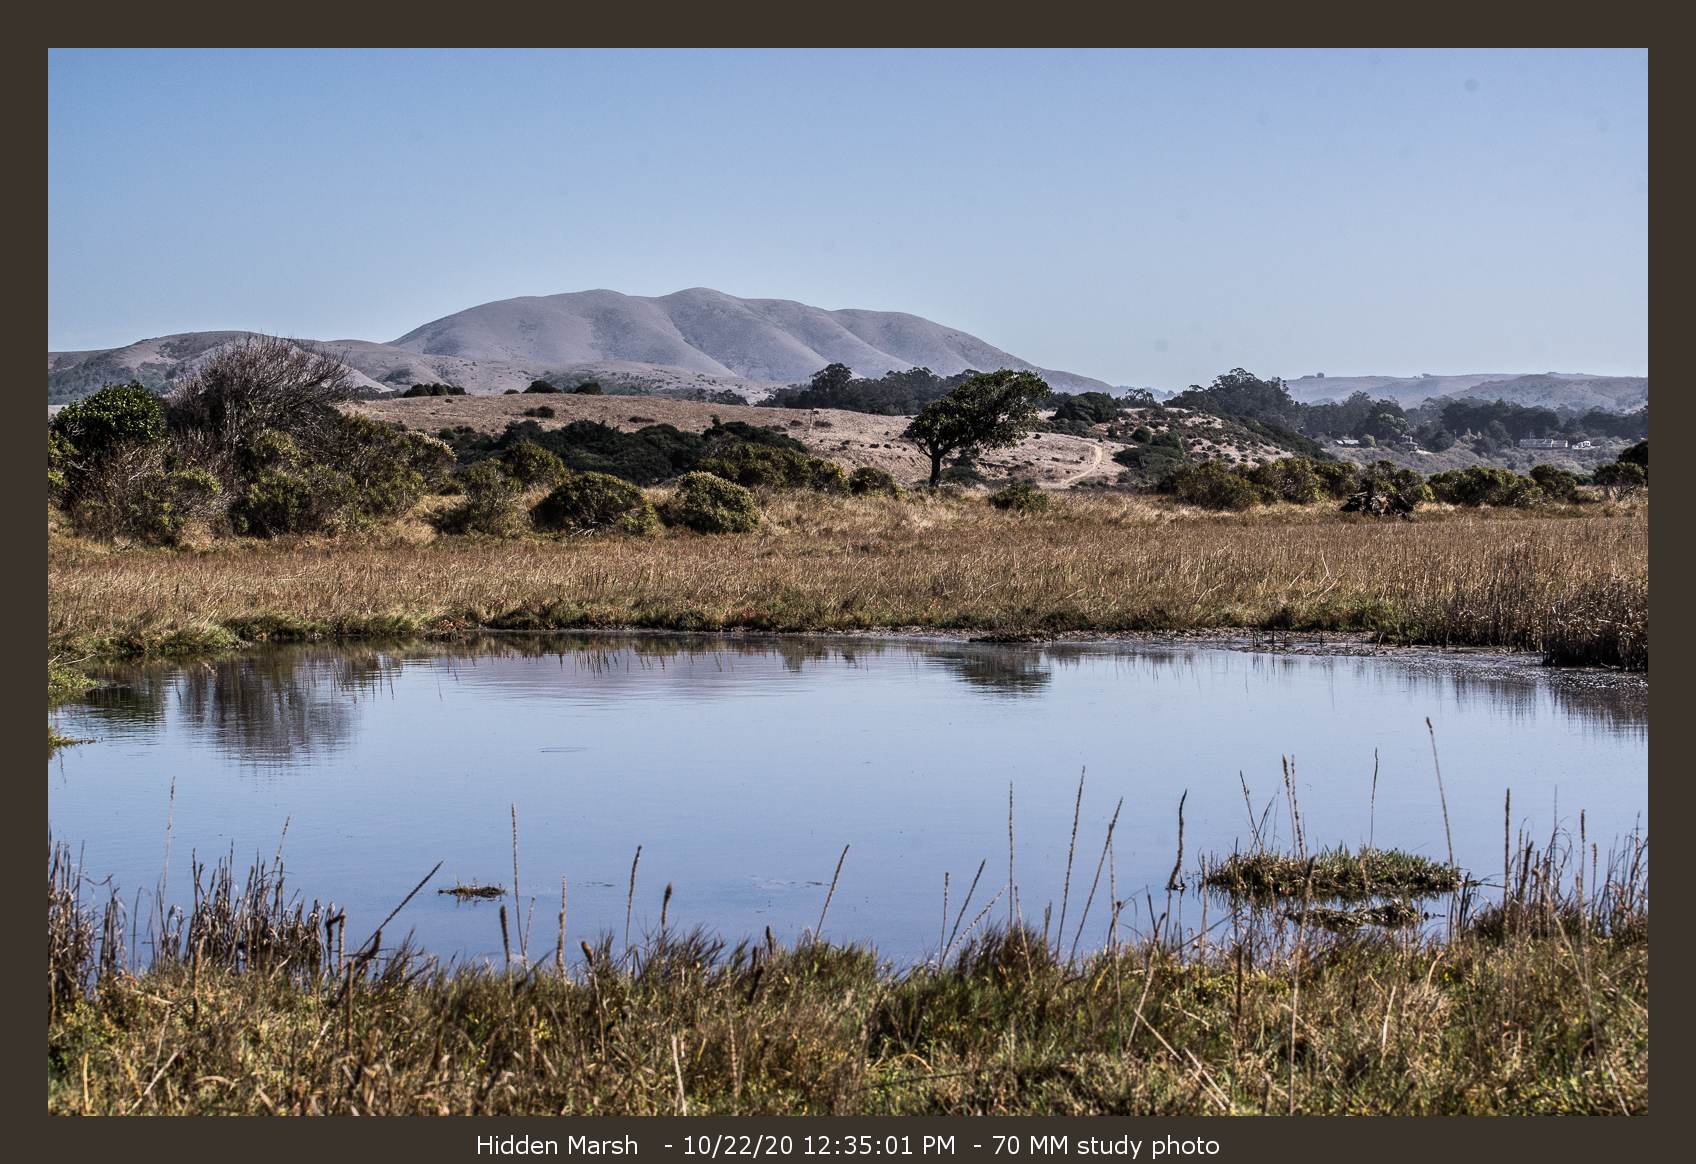
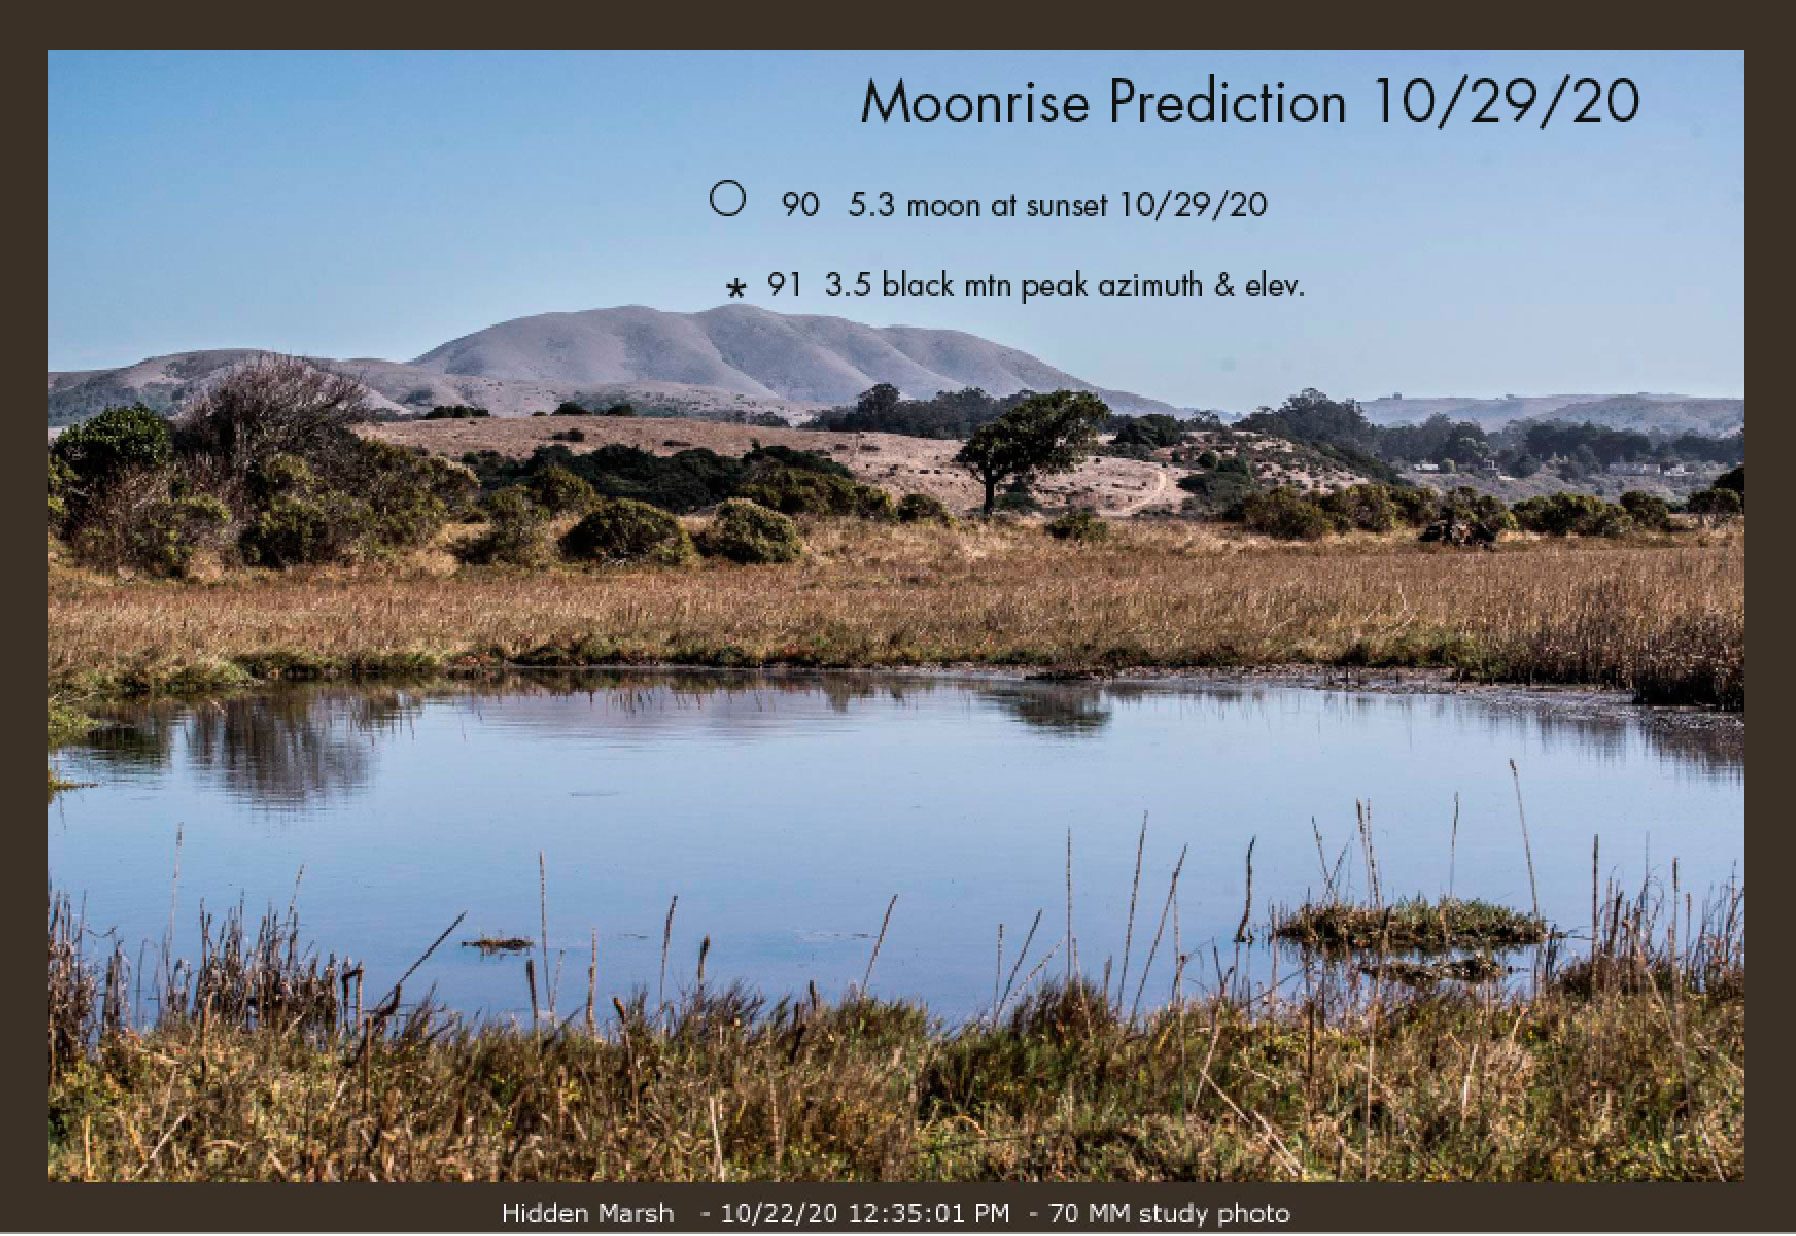
1. Make a daytime study photograph of target location:


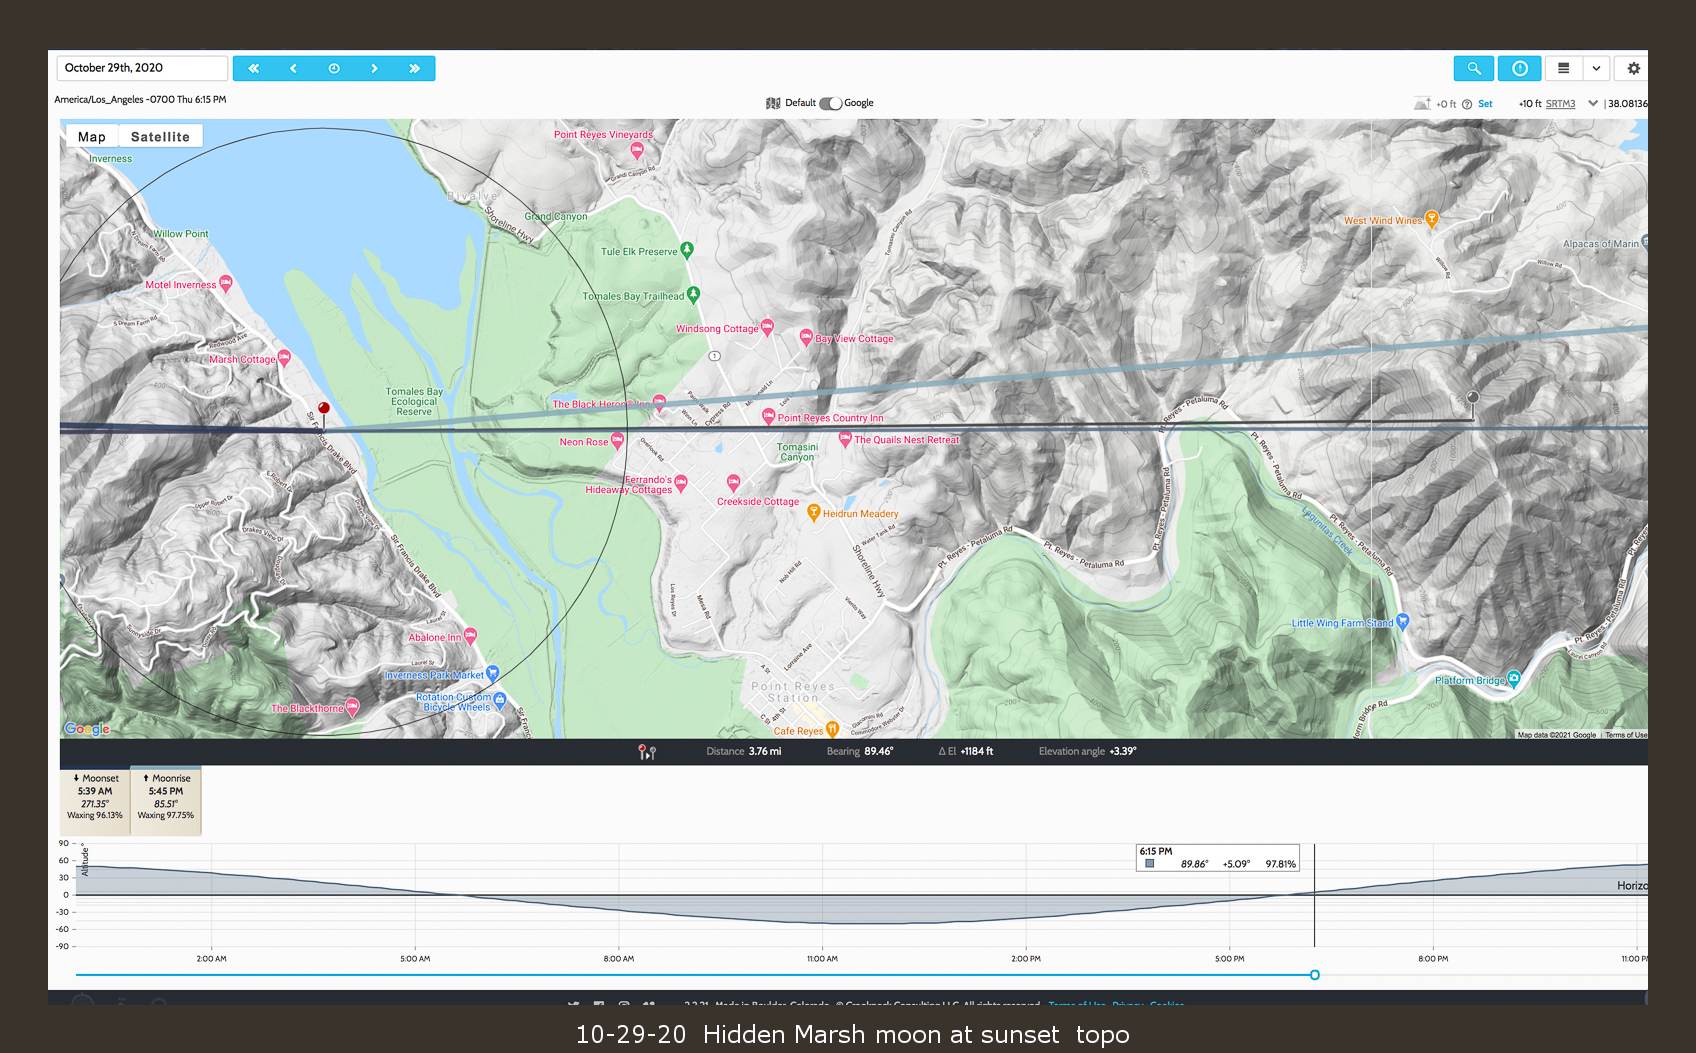
2. In Photo Ephemeris, satellite view, verify location:


3. In Photo Ephemeris, topo map, check bearings, elevation of moonrise:


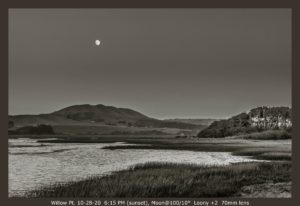
4. Create prediction photo using data obtained from Photo Ephemeris:


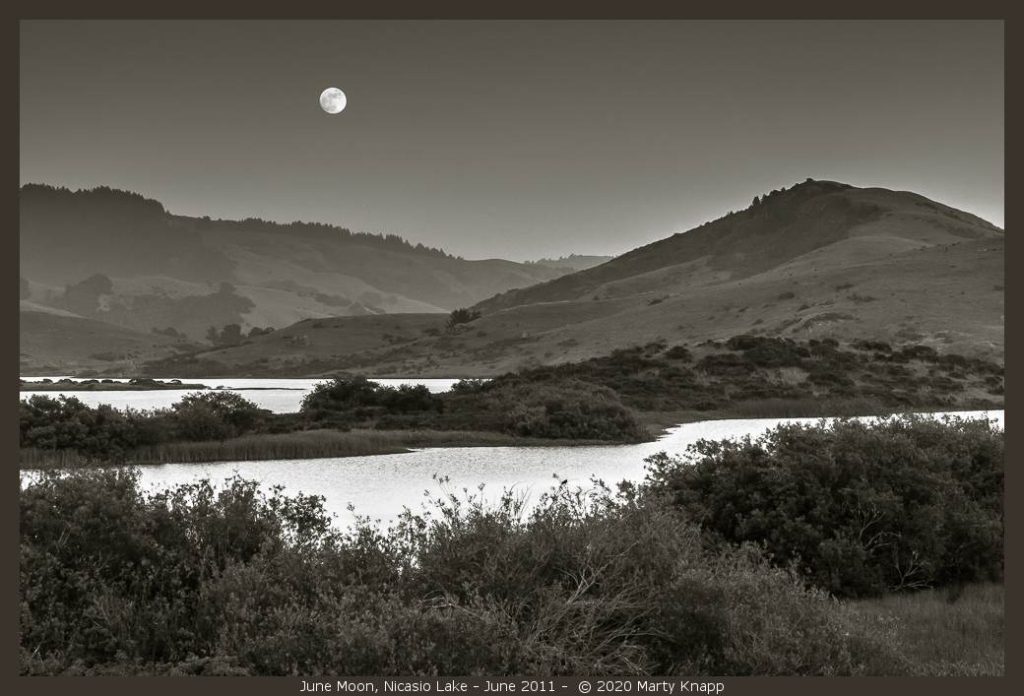
5. Arrive at destination on date & time selected to photograph the moon!

Dune and Clouds, Kehoe Beach

It’s the calm before the storm in Point Reyes today,Tuesday,  January 26, early afternoon. We’re hunkered down and prepared for high winds and plenty of rain… perhaps even coastal flooding. I love tumultuous weather. It makes me feel closer, more connected to my family and neighbors during those forces we cannot control. And, I can’t help thinking about how magnificent the sky looks when the storm departs. Thinking about this, I remember an afternoon in February of 1998 that I ventured out to Kehoe Beach during the tail end of a storm.  I wrote about my experience and the photo I made that day in an essay titled “Dune and Clouds.” 

We landscape photographers want to be there, ready, when the light breaks. Often that means venturing out in stormy weather, getting cold and wet, maybe even slipping and falling on a wet trail. There’s something about coming up against an obstacle… a challenge and not turning back that can reap a reward. That’s exactly what happened for me one afternoon in February, over twenty years ago!

Dune and Clouds, Kehoe Beach

February 1998

There’s a tradition at our house. When I return from a photo expedition, Jean asks, “How’d it go?” If things went quite well, my answer is something like, “I got my feet wet,” or, “I slipped and fell.” This usually makes Jean smile. “Tell me about it, please,” she’ll say.

On a stormy day in 1998, I did slip and fall as I trekked out the trail to Kehoe Beach. It was raining, and an offshore gale was driving the last visitors from the beach. They passed me, bundled in their parkas, heads down against the wind. I made my way against the flow. I’m not fond of getting wet or muddy, so this was pushing my limit. I had my hood up, and my camera wore its own rain gear. I took my eyes off the slick trail for just a second, lost my footing, and landed hard on my knee and elbow, saving my camera from the mud. I gathered myself, checking to see if my body and my camera made it okay through this surprising event. All was well and I felt a glow of excited anticipation for what could come. 

I was pushing myself because I knew that right after tumultuous weather, the light, the sky, the beach-—everything—could be breathtaking. But I rarely ventured so dangerously far from the shelter of my car in weather this rough. I pushed on….

I trudged over the dunes and down onto the windswept beach. I stood still and scanned the horizon. Not a soul to be seen save a brave man and his joyful dog jogging well to the north. It looked as if the sun would soon make an appearance. If it did, I wanted to be in a good place to photograph. The wind still howled. I watched as the sun seemed to draw the waters in the ocean with it as it set—“Dune and Clouds, Kehoe Beach.”

How to Photograph the Moon in the Landscape

January 2018 – On the eve of a total lunar eclipse

Part I: The Best Time to Shoot the Moon

What is a full moon landscape?
My personal definition of a full moon landscape photograph is a composition in which the moon is above the horizon and also includes elements of the landscape that give the viewer a sense of re-witnessing the event photographed. This type of photograph differs from what I call “moon portraits,” which feature the moon, greatly magnified and usually alone in the sky or with minimal landscape details in the composition.

June 2011

The best day for full moon photographs
Many beginners try to photograph the moon on the actual day of the full moon, usually with disappointing results. The problem is that by the time the moon appears above the horizon, the landscape is too dark to capture details in both the land and moon simultaneously.

The moon rises about 50 minutes later each day as it approaches the day of maximum fullness (astro full moon), when it rises at about the same time as the sun sets. The best day to photograph the full moon in the landscape is generally from 1-2 days before the astro full moon when it rises somewhat earlier than sunset. On those days the moon will clear the horizon and glow brightly above any hills, trees or building while there is still enough ambient light to record details in the foreground below. The trick is to choose a day that the moon’s position at sunset is high enough to clear compositional elements, but not so high that it seems disconnected to the landscape below.

October 1990

Exceptions always possible
Generally speaking, on the day of the astro full moon the land is too dark by the time the moon has risen to an agreeable position in your composition. Even so, some good moonrise landscapes can be made on the day of the astro full moon if there is an unimpeded horizon or interesting shapes available that can serve as foreground silhouettes in the composition.

Sept 1989

The best time of day for full moon photographs
The best time to catch the glow of the moon is around sunset, from several minutes prior to several minutes past the moment of sunset. Around that time the moon takes on an agreeable contrast to the sky which is beginning to darken. In deconstructing my own best moonrise photos I found that they almost always occurred within nine minutes before or after the moment of sunset. In a future lesson I will go over the tools I use for accurate prediction of day, time and place for a moonrise photograph.

Willow Pt. 10-28-20 6:15 PM (sunset), Moon@100/10° Loony +2 70mm lens

Exposure considerations for moonrise landscapes.
Manual exposure only, please!
Using auto exposure during the optimum time for photography (see above) will generally cause extreme over-exposure of the moon. Since the foreground has already darkened, the camera will attempt to bring more light (excessively) into the photo. Your foreground may look great but you’ll get a blank moon that looks more like the sun.

Start with Loony Eleven and bracket to +3
Loony Eleven defined: With aperture set on f/11, set your shutter speed to same number as your ISO setting. ie: if ISO is set to 200, then set your shutter speed to 1/200 sec. Then bracket in full stops to +3 by adjusting your shutter only. In this example your series would be:
Aperture f/11, ISO 200 shutter: 1/200, 1/100, 1/50, 1/25. Back at your computer examine your results. You may find, like me, that in the future you only need to make a couple of these exposures. From my own experience I determined to just make the +1 and +2 for most moonrises.

I hope you found the information above interesting and perhaps useful. In the Part II I’ll write about the methods and tools I use to predict where and when to be for the next great moonrise photo opportunity!