Infrared Test Shots from Joshua Tree NP
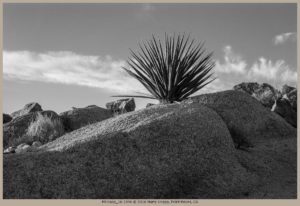
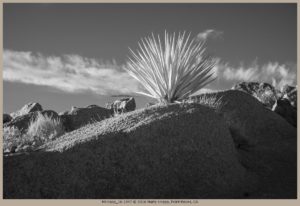
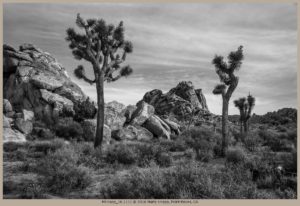
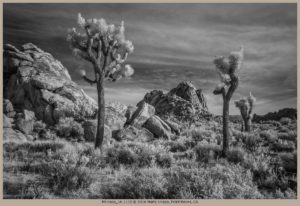
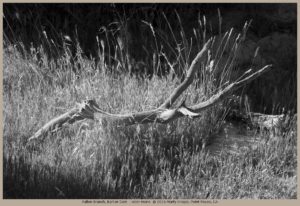
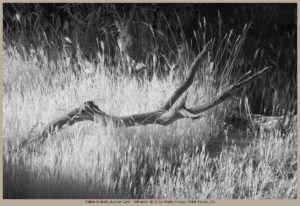
Visitors to my gallery often ask about the otherworldly lighting effects they notice in my Infrared Trees Collection. So, to demonstrate the differences, I recently made some test shots during my recent visit to Joshua Tree National Park. I photographed several scenes from the same vantage point in both infrared and full color raw. I converted the color raw file to monochrome to see how it compared to the infrared exposure. Check these out and be sure to scroll all the way down to see what the original scenes looked like in color.
All photos were made with my Sony Nex-7 which has had its sensor converted to full-spectrum capture. The full-spectrum conversion, done by LifePixel, allows me to use one camera to capture both full color raw and infrared digital files. I highly recommend Lifepixel’s website for a wealth of useful information about digital infrared photography.
The original color capture versions can be seen at the bottom of this post.
Click on any of these to see an enlarged view.
And, in case you were wondering what the scenes looked like before converting the files:

Marty, I shoot both digital and film (35mm & 120 6×7). I prefer B&W images and was shooting a lot of B&W film until I converted a DSLR scanned color negative to B&W in Lightroom Classic. Since then I’ve been shooting mainly color film so I can have a choice of color or B&W digital images. BTW, Even though I like shooting B&W IR images with my converted Sony a6000, I like your converted digital color images in this article better than the IR images.
Nice work! When you say LifePixel converted your Sony to a “full spectrum” sensor, do you mean you got the lowest level filter (more of the visible spectrum than the others)? Did you use the 72R filter on that Sony to further enhance the effect of the infrared conversion? What does the 72R do? Thank you, Marty.
Kenn-
Since the sensor in my Sony (and for that matter, nearly all digital cameras) is sensitive to an extended spectrum from UV through visible through near Infrared “light”, the manufacturers cover the sensor with what is communal called a hot-filter (kinda light greenish in color) This filter blocks UV and Near-IR from hitting the sensor. A technician removes it from the sensor. Then you buy a circular “hot filter” and perhaps a 72R to control the light that hits your sensor. You control it all from the front of your lens, thus making your full spectrum camera capable of photographing either in full color or near-IR!
I see. You have the internal filter that comes with the camera removed, but not replaced with one of Lifepixel’s own infrared filters (like I did). Then you just either put the external “hot filter” on your lens if you want “normal” color, or the 72R if you want infrared. What a great, flexible idea! I committed the camera to infrared by having them install one of their IR filters to replace the hot-filter.
Yes. That’s how I did my first conversion. I had the 72R installed inside the camera so it was dedicated to IR. I like the versatility of the full-spectrum approach better, but it can be costly if you have lots of different-sized lenses to filter.
Kenn & Marty, I selected the Full Spectrum conversion as well on a Sony a6000. I purchased the camera new and sent it straight to LifePixel for their full spectrum conversion. I also bought about a half dozen of their filters for special effects but find that 99.9% of the images I shoot are B&W because I’m not a big fan of color IR images. I like the fact that I can use the camera to take regular photos by simply installing LifePixel’s “hot filter” to the front of any lens.
Great comparisons! Thanks for sharing your technique and images.
Thanks, Scott! Looking forward to our photo get-together.